Top Tips | OneDrive
OneDrive is an online cloud storage service within Office 365 which lets you store files so you can access them from multiple devices, and is perfect for flexible working!
It’s easy to get started with OneDrive, and you may have used it in some capacity already. For a full guide on getting started, take a look at our How to guide.
Below we’ve listed our top tips for getting the most out of OneDrive once you’ve started using it.
1. Working flexibly on and off-campus
OneDrive is a fantastic tool for working both on and off-campus. By saving your work to OneDrive, you can continue working on files or projects in multiple locations – perfect for working on and off-campus without losing valuable progress.
You can easily save your progress to a OneDrive folder and pick up where you left off if, for example, you need to work from home one day, and then in the office the next. Office 365 as a whole aims to make it easy for you to work flexibly in an online space, and grants you more freedom to continue your work wherever you are.
2. Using OneDrive on Mobile Devices
You can access your files stored on OneDrive anytime, anywhere by setting up OneDrive on your mobile.
The mobile app lets you:
- Open your files in Word, Excel, or PowerPoint to edit them.
- Share, delete, move, or rename files.
- Save files offline so you can view or edit when you’re not connected to the internet.
- Create new files and folders, take photos or videos, and upload new files.
- Use Scan to turn a document, whiteboard, or business card into a PDF that you can annotate and share with others.
There is a full range of resources available on the Microsoft Support site to help you set up on Android or iOS.
3. Synchronising with your Device
You can synchronise your OneDrive storage with your PC or Mac, meaning the files stored on your OneDrive will reflect those in the OneDrive folder on your machine (default name “OneDrive – University of Lincoln). If you add, change, or delete a file or folder in your OneDrive folder, the file or folder is added, changed, or deleted on the OneDrive website and vice versa.
This is particularly useful for remote working and backing up your files, as you can store all of your files in your OneDrive folder on your PC and access them from anywhere, without having to manually upload regularly.
Please Note: You should always be careful when synchronising files to personal devices. Always ensure that Personal Data, Special Category Personal Data and Non-Public Information is stored securely.
For information on how to set up OneDrive synchronising on your device, take a look at the Microsoft Support guides here.
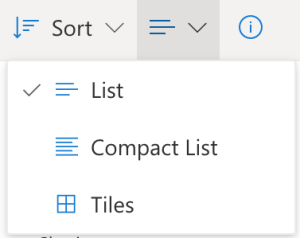
4. Changing your view of Files and Folders
To change the view of your files in OneDrive, simply click on the drop-down button next to Sort in the top right corner and choose from the available options. The Tiles option is often useful as it displays thumbnail previews of image files, pdfs, and more.
5. Uploading up to 100GB Files
With 1TB of OneDrive storage available, you have plenty of room to upload large files. OneDrive now supports single-file uploads of up to 100GB, but it is recommended that when uploading large files, you use the OneDrive Desktop client to minimise any potential performance disruptions.
6. Creating a File Request
In some instances, you may wish to setup an area for users to upload files, which can only be seen by you – similar to a submission.
With the file request feature in OneDrive, you can choose a folder where others can upload files using a link that you send them. The users that you request files from cannot see what’s in the folder – they can only upload files to it.
For information on how to do this, take a look at the Microsoft Support page here.
If you have any specific questions or queries, or any technical issues with Teams, give us a call on 01522 88 6500, or email us at ict@lincoln.ac.uk
7. Recovering Deleted Files
When you delete items from SharePoint and OneDrive, they aren’t permanently removed straight away. Deleted items go into the recycle bin for a period of time before being permanently deleted.
If you delete an item from your OneDrive online (via 365.lincoln.ac.uk), it will be moved to your OneDrive recycle bin. If you wish to recover the item, follow the steps below:
- Click “Recycle bin” in the left-hand menu.
- Select the file you wish to recover.
- Click the “Restore” button at the top of the page.
If you delete the item from your Recycle bin, you will find it in the second-stage recycle bin. A link to this can be found at the bottom of the recycle bin if you have the necessary permissions.
IMPORTANT: If an item stays in either of the recycle bins for over 93 days, it will be permanently deleted and cannot be recovered by service administrators.