How To… | HP Wide Curved Monitors
Connecting and Switching On
To connect a laptop to one of the wide monitors (HP E34m G4) on campus, you will first need to connect to its corresponding docking station (usually via USB-C). Find the cable and connect it to the USB-C port on your laptop. Click here for full instructions on how to do this.
Next, you will need to turn on the monitor. You can find the power button on the bottom-right underside of the monitor, similar to standard-size monitors. It is the largest button, first from the right (see below). The white LED will come on when the monitor is switched on.
It is recommended you use the full extent of the screen space available to you. The laptop and monitor can display different windows. For example, you can have a word document available on your laptop screen, and have a Teams call running on the wide monitor. You may need to set this up the first time you use a docking station.
To see separate Windows on both the laptop screen and the monitor you need to extend the display:
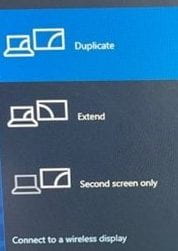
- Hold down the ‘Windows’ key and press the ‘P’ key.
- Select the ‘Extend’ option from the menu and press ‘Enter’.
- You will now see different windows on each screen and will be able to move the mouse cursor from one to the other. You can also drag windows to each as needed.
You may find the laptop screen is on the wrong side of the monitor. If this is the case, your mouse will not move from the laptop to the monitor from the correct side of the screen. To fix this:
- Click on the Windows icon at the bottom left of the screen.
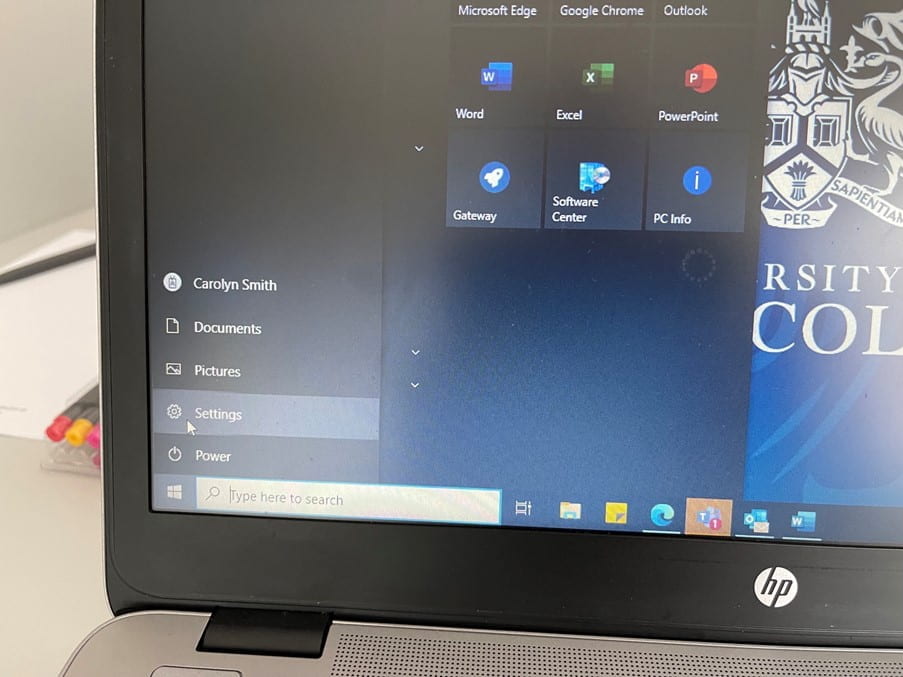
- Select the ‘Settings’ cog.
- Select ‘System’.
- Select ‘Display’.
- Click on ‘Identify’. If the screen and monitor are the wrong way round, the numbers displayed will not match those shown in the diagram.
- To correct this, drag the laptop screen in the diagram to the correct side of the monitor.

- To save these settings, click ‘Apply’.
Your mouse will now move correctly from the laptop to the monitor.
As long as the laptop is always placed on this side of the monitor, you will only have to do this once. Click here for full instructions and more information.
Camera
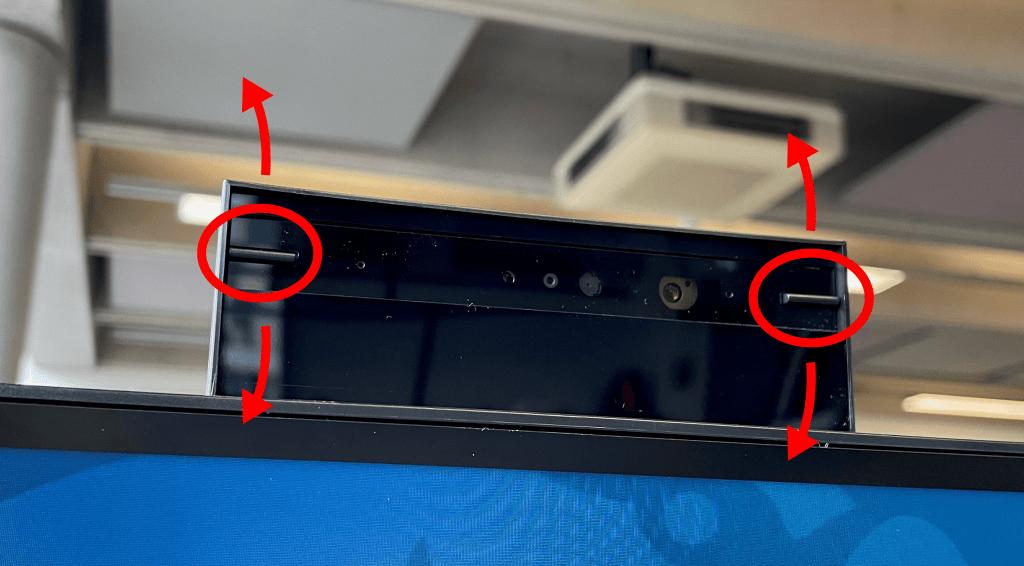
The built-in camera is situated on the top of the monitor and can slide in/out for convenience and privacy.
You can also tilt the camera up and down inside the casing by using the small rubber grips on each side.
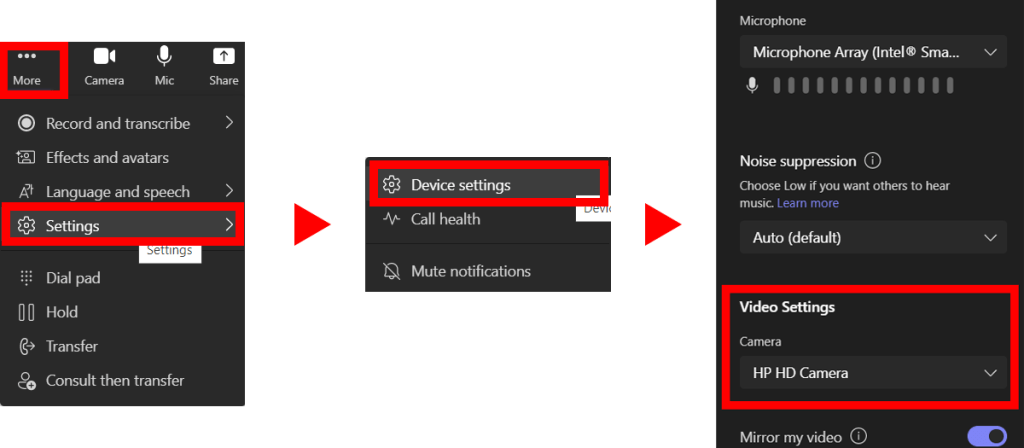
In some cases when using Teams, the incorrect built-in camera is selected automatically, meaning the built-in camera on the wide monitor is not being used. To rectify this in a call, select “More” from the top of the window, then select “Settings”, then “Device Settings”. In the sidebar you can then toggle between available cameras from the drop-down menu.
Sound Settings
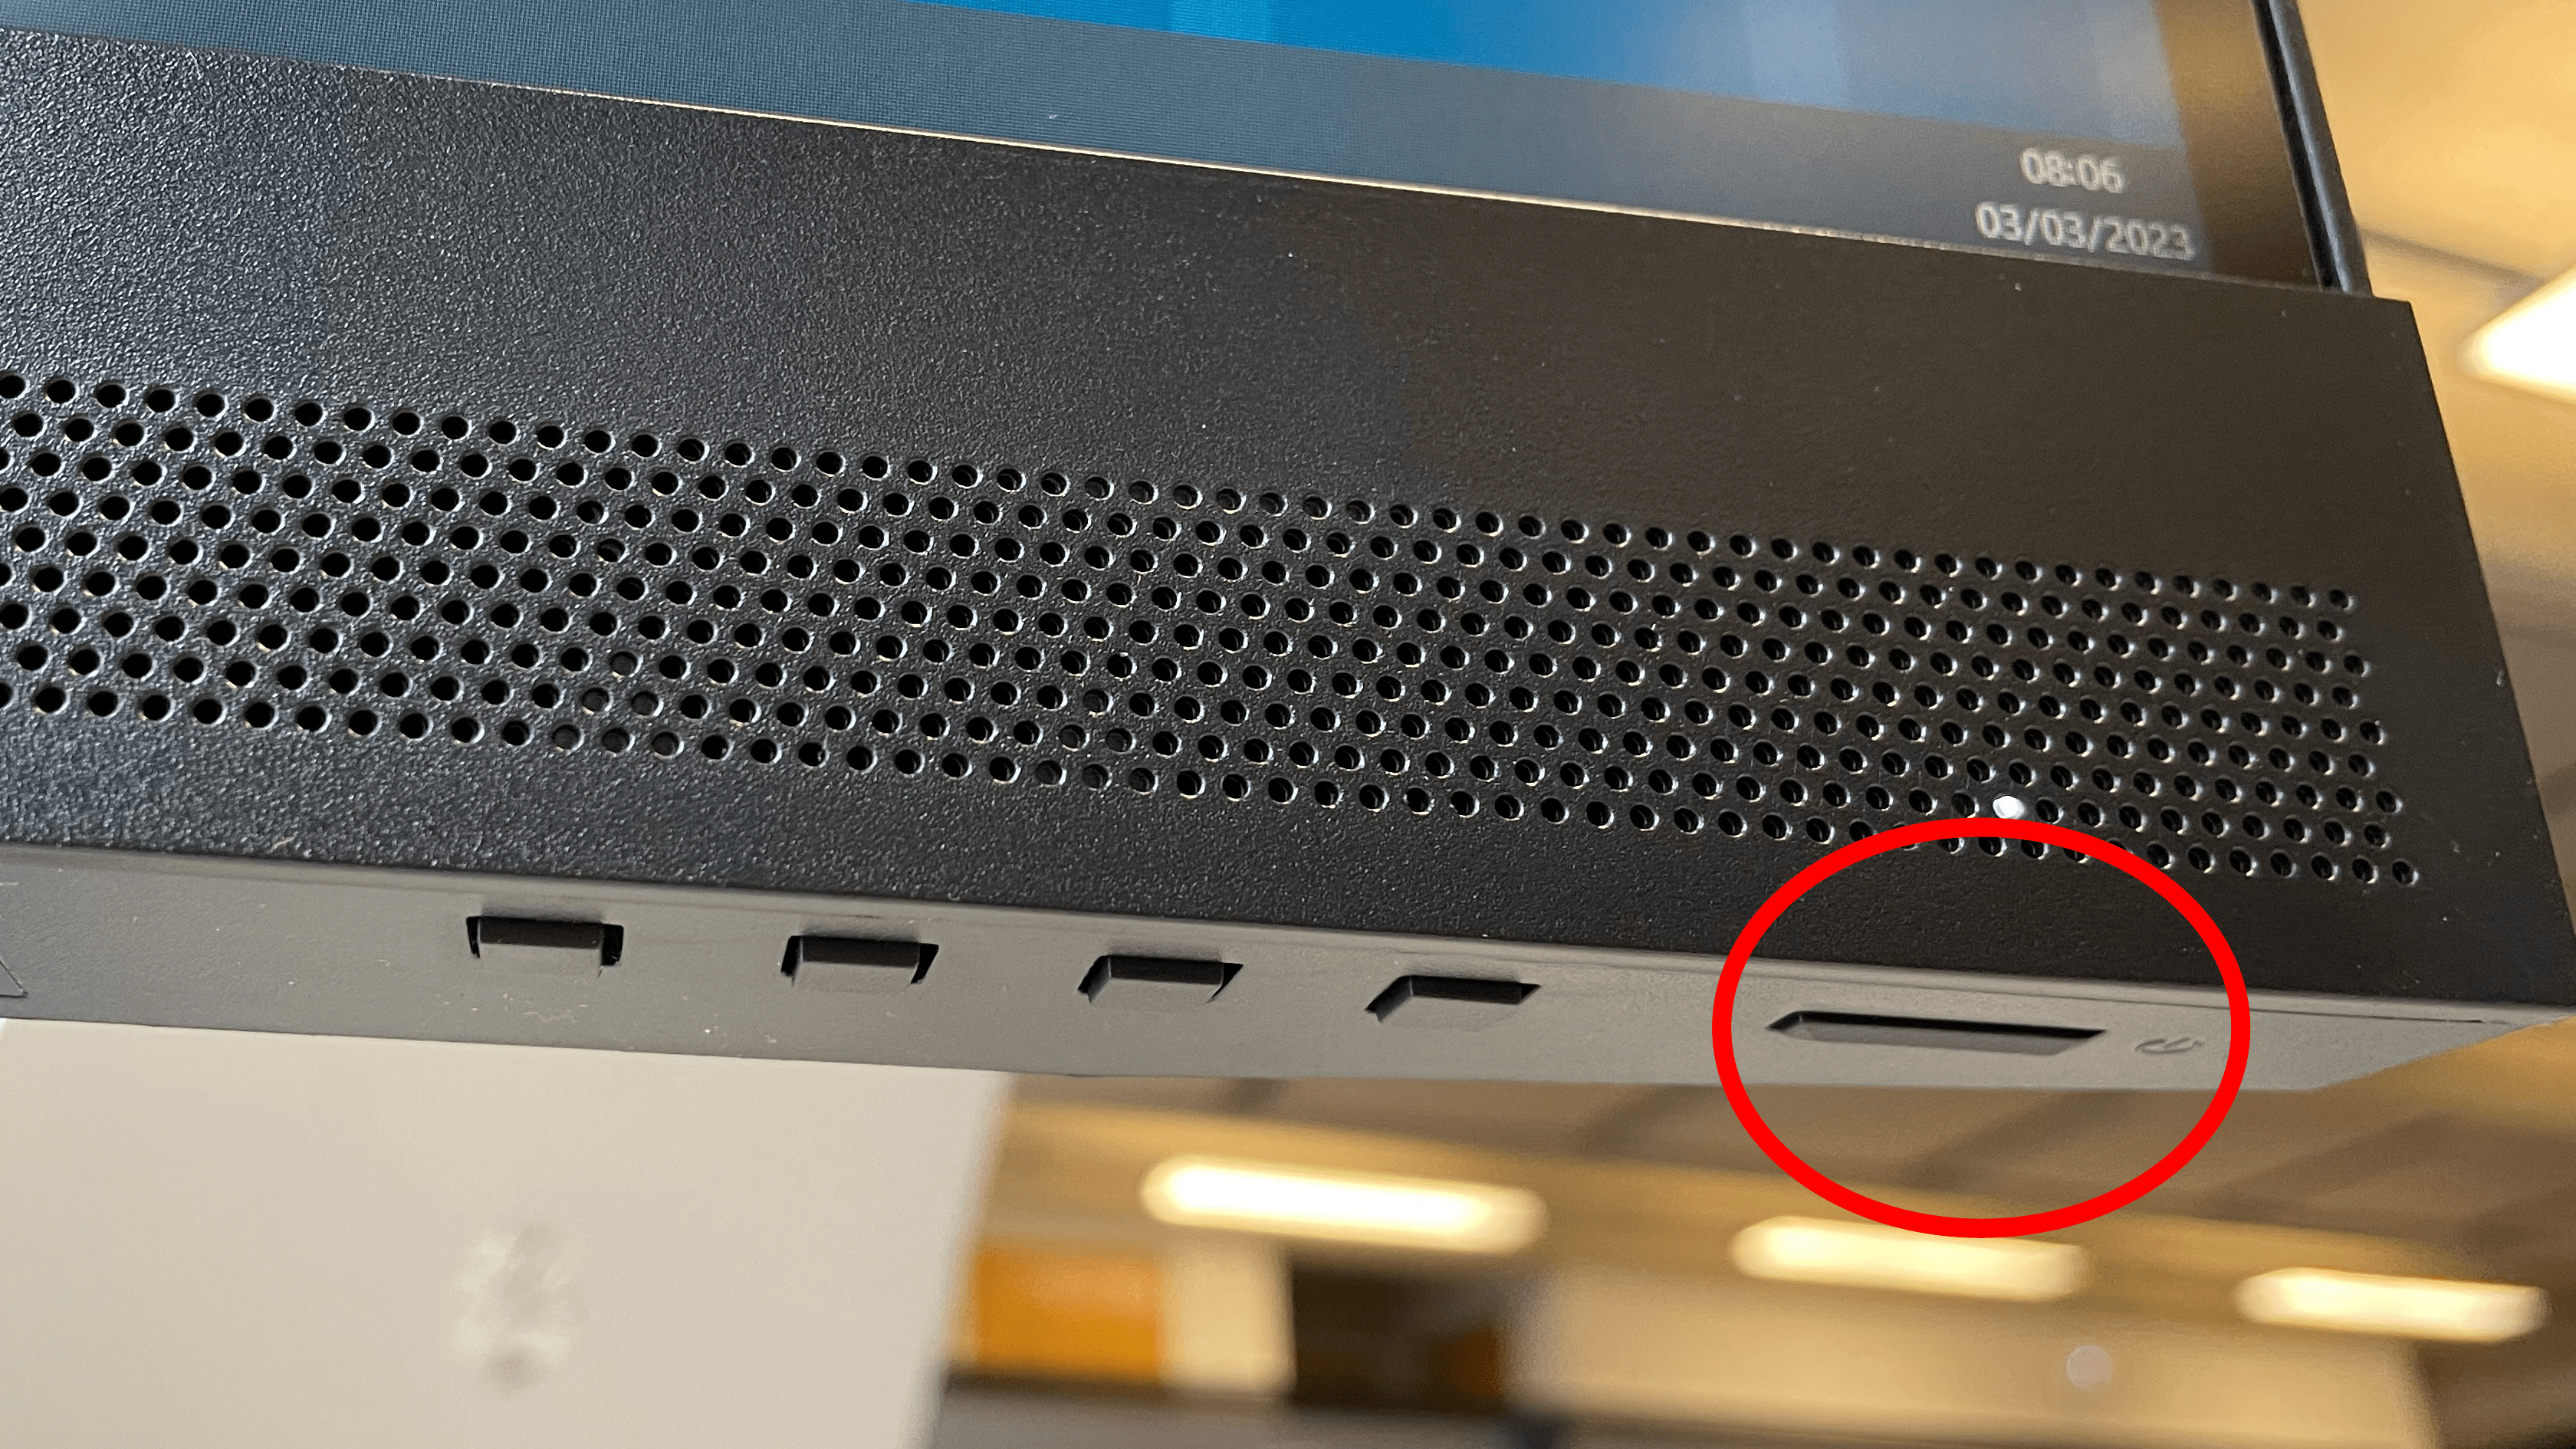
On the bottom-left underside of the monitor, you will find the settings for the built-in speaker volume and the built-in microphone. The four buttons have corresponding icons relating to their functions (see below).
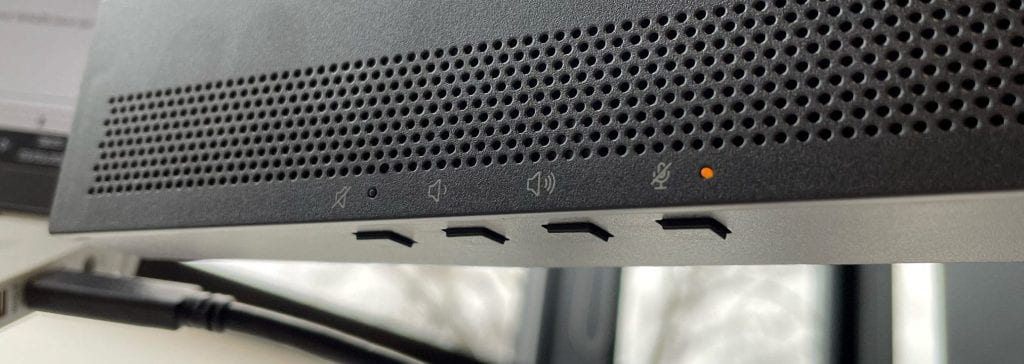
From left to right, these are:
- Built-in speaker mute toggle
- Built-in speaker volume down
- Built-in speaker volume up
- Built-in microphone mute toggle
If the light is on for either of the mute options, that means the mute is turned on. E.g. in the image above, the microphone is muted.
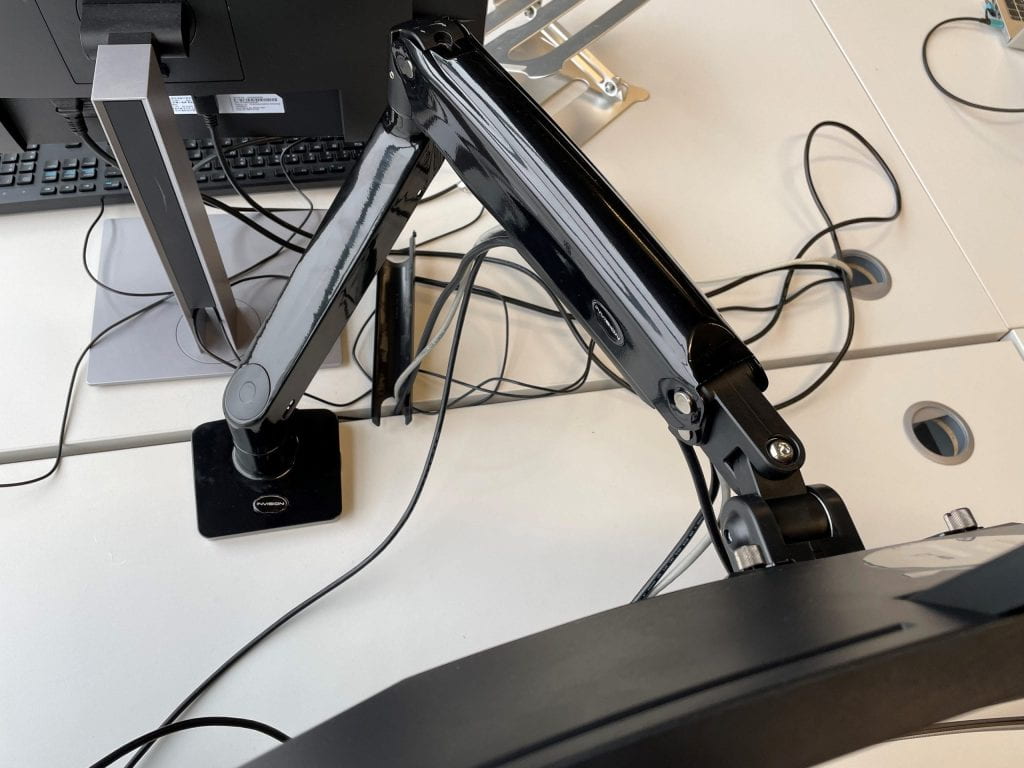
Monitor Arm/Stand
All wide monitors will be fitted to an adjustable arm attached to the desk. This allows you to freely move the monitor up or down, forwards or backwards, and tilt left and right as needed for comfortable viewing.
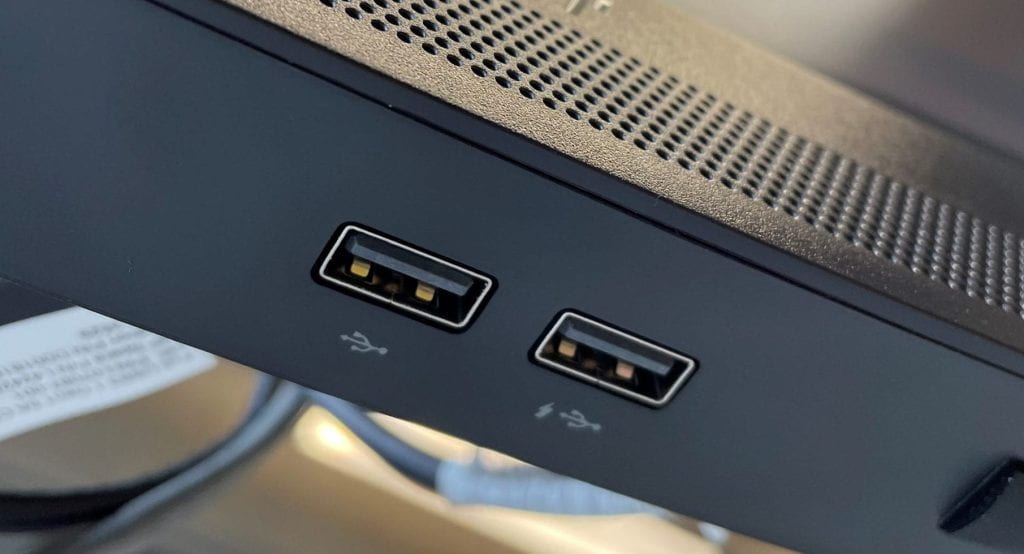
Built-in USB Sockets
Two USB sockets are also included in the centre of the underside of the monitor; the port with the lightning symbol is ideal for charging devices.
Sharing Your Screen
When sharing your screen in a Teams call (or equivalent) from a wide monitor, be aware that the entire contents of the screen will be shared. For data protection reasons, please consider using the ‘Window’ option rather than ‘Screen’ (in Microsoft Teams) to share only what is intended.

Correcting Your Resolution For Multiple Displays
To ensure you have the correct resolution on your displays, follow the steps below.
- Click on the settings cog in the Start menu.

- Select “System”.
- Change the “Display Resolution” and “Multiple displays” drop-downs to suit your preferences.
Closing Your Laptop
To close your laptop while using the display, follow the steps below.
- Click on the settings cog in the Start menu.
- Select “System”.
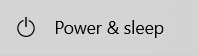
- Select “Power & sleep”
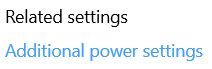
- Select “Additional power settings”.
- Select “Choose what closing the lid does”.
- Select “When I close the Lid” and change the setting to “Do nothing” in both of the drop-down menus.

Organising Your Workspace
To make the most of the larger screen, you may wish to open multiple windows or zoom in to get a better view of the window you are currently working in.
Snapping Windows
To snap windows to fit a layout on your screen, simply click and drag your desired window to one of the edges of your monitor, then release when the snap layout box appears. This will allow you to organise and snap your windows quickly and easily.
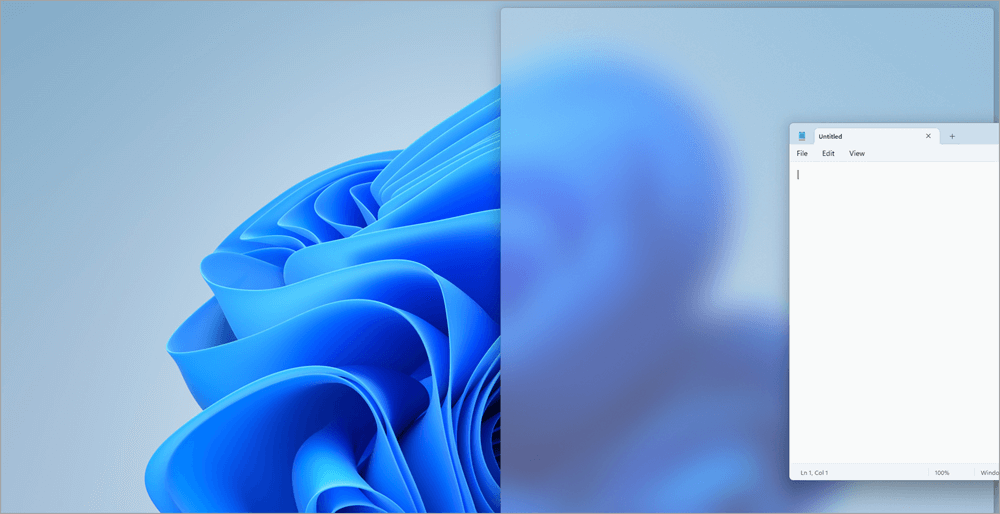
Snapping is context-sensitive. For example, if you drag to the side of your screen, the window will fill half of the space, and you can choose from other open windows to fill the rest. If you drag to the top, you will fill the screen with your selected window. If you drag to a corner, you will fill a quarter of the screen.
This can also be performed by holding the Windows key, and using the arrow keys to move your currently selected window.
Click here for the full Microsoft guide
Zooming
In some programmes and web browsers, you may find it beneficial to zoom to make text more readable on a large monitor. In most instances, this can be done by holding the Ctrl key, and pressing the + or – keys. Alternatively, you can press and hold the Ctrl key and use the scroll wheel on your mouse. Please note this may not work with all programmes, but works with most web browsers and Microsoft Office Applications.